online poker

Apr-16-2019

Why Luxury Vinyl Tile?

Posted by Carpets N More under Flooring, Luxury vinyl tile

Luxury Vinyl Tile has become an extremely popular flooring choice amongst homeowners. Loved for its style choices and durability, Luxury Vinyl Tile can provide everything you want in one flooring option. If you are interested in learning more about Luxury Vinyl Tile, we created this simple guide to help you. Enjoy!

Why Luxury Vinyl Tile?

Also known as LVT, Luxury Vinyl Tile is the solution for active homes wanting a stylish, affordable flooring option. LVT is constructed with several layers: a wear layer, image layer, and a core and backing. Luxury Vinyl Tile is 100% waterproof, making sure that it will not swell or buckle. Lastly, LVT is exceptionally durable, making it the perfect choice for active, busy households. Its scratch, stain, and wear resistant allows it to thrive in the busiest of homes.

Easy Installation

Luxury Vinyl Tile is easy to install and can be used in rooms that you never imagined possible. This unique flooring can work in basements, kitchens, and bathrooms to create a trendy and stylish look. Plus, with an array of different sizes, colors, textures, and styles, you are sure to find one that you will love.

The Perfect Alternative

Luxury Vinyl Tile (LVT) is the perfect alternative solution to hardwood and ceramic tile. With LVT, you can get the look of hardwood without sacrificing durability. Plus, LVT works perfectly in moisture-attracting rooms—giving homeowners the opportunity to put in places that they never imagined possible! LVT is also an excellent alternative for ceramic tile because it is softer and warmer than tile’s hard-surface.

Plenty of Styles

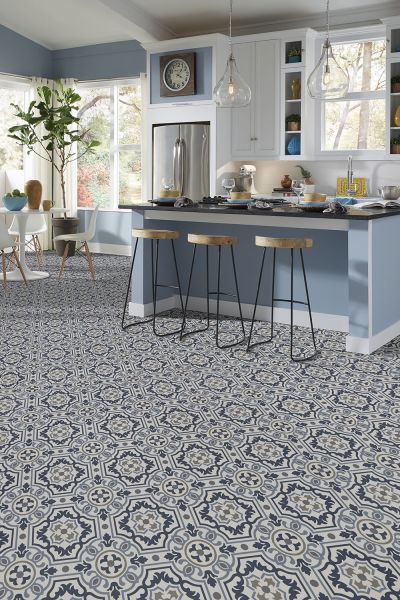
Luxury Vinyl Tile’s versatility makes it a popular choice amongst homeowners. Whether you are looking for something close to hardwood or natural stone, LVT can give you the look and performance that you are seeking. Some of the stylish options for homeowners to choose from are Authentic-Looking Wood, Natural Stone, and Textured/Finished Effects.

We have a wide selection of different Luxury Vinyl Tile options for homeowners. To browse our vast selection of LVT, take a look at our online showroom here.

after-installToday’s post is wrapping up what you need to know about luxury vinyl tile (LVT). If you missed our other posts on LVT, be sure to check them out here.

Here’s what you need to know after installation of LVT:

Depending on the manufacturer these guidelines may vary:

After installation, furniture and foot traffic should not be on the floor for at least 24 hours. This allows the adhesive to dry completely.

After installation, the floors should also not be washed for 48 hours.

The adhesive residue on the floors after installation can be removed with mineral spirits.

Floor covering subjected to excessive heat and light exposure is subject to

thermal degradation. Use appropriate precautions to minimize potential

affects on the floor covering.

Oil or petroleum based products can result in surface staining. Do not track

asphalt driveway sealer or automobile oil drips onto the vinyl floor covering.

During the life of the floor, the temperature should never drop below 55°F.


Care and Maintenance

Floors should never be flooded with water or be allowed to have standing water. This can loosen the adhesive.

Care should be taken with heavy furniture and appliances. Furniture protectors should be used that are at least 2” in diameter. The hard and small buttons sometimes found on the bottom of chairs and other pieces of furniture should be removed. High heeled shoes also apply here.

Protect the floors from dirt and grit that can be tracked in by using walk off mats at every entrance.

Do not use rubber backed mats. Certain rubber compounds can permanently stain vinyl.

Never use vinegar, acetone or lacquer thinner to clean these floors.

For extreme staining like nail polish , paint, dye and permanent markers try applying fingernail polish remover that contains acetone, but is not pure acetone with a soft cloth and gently rub.

Spills should be removed immediately.

The floor should be swept, dust mopped or vacuumed on a regular basis.

Stubborn rubber heel marks can be removed with a soft cloth dampened with mineral spirits.

When the floor gets build up, consult the with the manufacturer’s recommended cleaner system to see if a stripper is available.

May-29-2010

Luxury Vinyl Tile – More Detail You Need to Know

Posted by Carpets N More under Luxury vinyl tile

before-you-buyWhat to know before you buy Luxury Vinyl Tile

  • These floors should not be used in high moisture areas.

  • Typically, these floors should not be installed over existing resilient floors.

  • When using radiant heat flooring, the substrate should not exceed 85°F.

  • If not installed properly, the floors can look unsightly and not wear properly.

  • These floors can scratch and indentations can be made.

  • It is recommended that these floors not be exposed to too much sunlight. Drapes and window coverings are recommended during peak sunlight hours.

  • Hot items like cigarettes and matches can burn the floors.


Installation – Preparing for:

Depending on the manufacturer these guidelines may vary:

The floor covering, adhesive, and room temperature must be kept with

in a temperature range of 65°F to 100°F for at least 48 hours before,

and 48 hours after installation. In certain cases where epoxy adhesive is used, the temperature should not exceed 85°F.

The flooring material should be allowed to acclimate to the temperature of the area it will be installed for at least 48 hours in advance.

Start with a clean jobsite, a prepared subfloor and remove any items that may damage a finished installation. Substrates must be dry, clean, smooth, and free from paint, varnish, wax, oils, solvents, adhesive from former flooring and other foreign matter.

A properly prepared subfloor is important because the wrong type can telegraph through the new floor. This will not only be unattractive, but it will cause uneven wearing. Underlayment panels are intended to provide a smooth working surface, but are not designed to correct or properly cover structural deficiencies.

Some types of nails, such as common steel nails, cement coated or someresin or rosin coated nails, may cause a discolor-ation of the vinyl floor covering. Use only non-staining fasteners with underlayment panels.

Before getting started, check each box to make sure it is the right style, color and pattern number. Then, be sure to check and make sure the dye lot numbers are the same on each box. It is best to know if a box does not match in the beginning in order to give you time to get a replacement. If there are many boxes that are not the same, you may need to return the entire shipment.

Once you have checked all of the cartons, mix tiles or planks from each carton to minimize shade variation.


Read the manufacturers installation instructions to see if your subfloor is suitable to install the new product over. Often, resilient products should never be installed over residual asphalt type or cut back adhesive. It can bleed through onto the new flooring. All of the adhesive needs to be removed or properly covered before proceeding with the installation.

The manufacturer’s recommended adhesive should always be used in order to maintain the manufacturers warranty.


When installing, be careful and precise measurements must be taken during tile layout. Lay all tiles in the same direction, all directional arrows pointing in the

same direction. With plank layout it is also important to balance the layout of the plank format. Proper planning and layout will revent narrow plank widths at wall junctures. Accurately easure the room todetermine the center line, adjust this stablished line to accommodate a balanced lay out and then transpose this line to a comfortable width away

from the starting wall (approximately 2’ to 3’ wide). Apply the adhesive in this area and begin installing planks.

_

When determining the proper layout for mixing tile and planks for custom installations it is important to consider overall pattern and concept before getting started. The pattern should be carefully calculated and laid out for a successful installation.

When the installation is complete, most floors must be rolled with a minimum 100 pound three-section

floor roller immediately after installation. Roll the flooring in both directions

to firmly seat the tile into the adhesive.

Next, we will follow up with what you need to know after installation as well as care and maintenance advice for Luxury Vinyl Tile. Be sure to check out our previous post on advantages, styles and how LVT is made.
May-27-2010

Luxury Vinyl Tile (LVT)

Posted by Carpets N More under Luxury vinyl tile

2010-05-27_122829Luxury Vinyl tile floors are a durable, affordable and attractive alternative to ceramic tile, natural stone and hardwood. Patterns can be created for a modern look with metallic styles or traditional looks with travertine and slate looks.

Advantages to these floors include:

 Ease on joints
 More quiet underfoot than most hard surfaces
 Easy to maintain
 Available in wide variety of styles, colors and sizes
 Commercial and residential use
 Real wood, tile and stone looks
 Easier installation than ceramic or stone

How it’s made

Limestone Composite Construction Resists Cracking

One particular product on the market is made of 67% post consumer recycled material. Vinyl products that were previously discarded in a landfill are now reclaimed in a proprietary process. LEED points are available for these products.

Styles

Luxury vinyl tile comes in a variety of styles, shapes and colors. The different types of styles include:

 Planks
 Tiles
 Wood looks
 Decorative borders
 Geometrics
 Tile and stone looks
 Grout option or no grout option
 Overall patterns

An advantage to Luxury Vinyl Flooring is the ability to install modular patterns. Different tiles can be combined, different planks can be combined as well as tiles and planks can be combined.

Stay tuned for more info on LVT – what to know before you buy, what you need to know before and after installation and care and maintenance advice!

Apr-21-2010

Luxury Vinyl Tile

Posted by Carpets N More under Specialty Flooring

resilwhy03If your memory of vinyl flooring is that of industrial style vinyl tiles underfoot at the old supermarket, memorize this: today’s vinyl tile has gone beautiful. That’s one reason it’s called Luxury Vinyl Tile (LVT).

LVT is illusional. LVT features printed designs that mimic hardwoods, stone, ceramic tile, metal flooring, bamboo, marble — you name it. It simulates these materials so well that most people can’t tell the difference between the real and LVT. (We dare you to try!)

LVT is luxury without the price tag. We know you’re not made of money and neither is LVT. It’s beautifully affordable, and that’s no illusion.

LVT is tough. It offers you the look of ceramic tile or stone without the cold bare feet. (brrr!) It’s stable, quiet underfoot, stands up to wear and tear and won’t splinter, chip, crack or need waxing.

LVT celebrates versatility and flexibility. Practical in any room in your home, LVT comes in countless styles and patterns, colors galore and sizes from 4”, 6” and 8” planks to 12”, 16” and 18” tiles.

LVT is, BTW, ideal for DIY. Easier to install than ceramic tile or stone, LTV is a favorite project for weekend handymen and even handier women.

Note: “peel and stick” vinyl tile is not the same as LVT and can fail over time, creating loose tiles. Ask us for guidance.

Feel free to call us for more information or to ask a question. And don’t hesitate to leave a comment here – we’d love to hear from you!