online poker

Archive for the ‘Thanksgiving’ Category

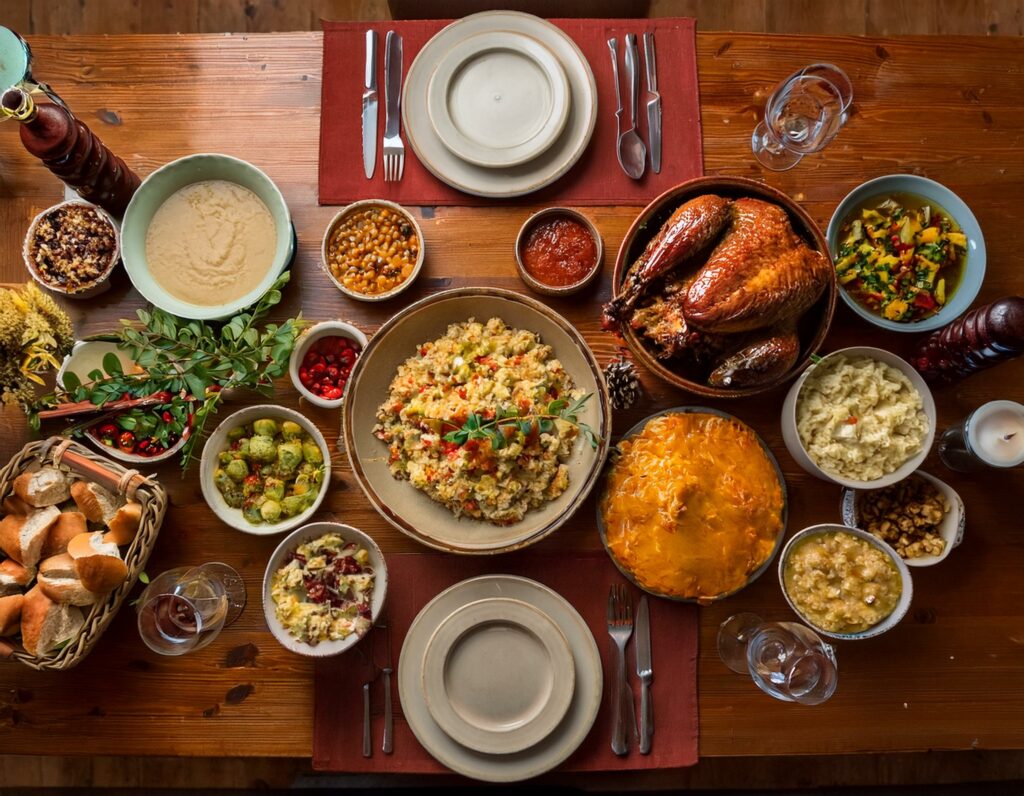
Thanksgiving is a celebration of food, family, and gratitude. But once the guests leave and the dishes are done, what remains? A refrigerator packed with leftovers waiting for their next chapter. Instead of dreading the repetition of turkey sandwiches, embrace the opportunity to transform your leftovers into gourmet creations. Here’s how to give your Thanksgiving remains the culinary love they deserve.


1. First Things First: Smart Storage

The longevity and safety of your leftovers begin with proper storage.

  • Seal the Freshness: Use airtight containers for each dish to prevent flavor mixing and keep everything fresh longer.
  • Freeze Strategically: Freeze turkey, stuffing, and mashed potatoes in portioned bags to make future meals easy. Squeeze out excess air to avoid freezer burn.
  • Organize Your Fridge: Place items that should be eaten first (like fresh salads) front and center. This helps prevent overlooked leftovers from going to waste.

2. Give Turkey a Makeover

Turkey is versatile, making it the perfect canvas for global-inspired dishes.

  • Turkey Ramen: Simmer turkey bones with soy sauce, ginger, garlic, and scallions to create a broth. Add noodles, sliced turkey, and your favorite veggies for a soul-warming bowl.
  • Turkey Enchiladas: Roll turkey with cheese and a touch of cranberry sauce in tortillas. Top with enchilada sauce and bake for a cheesy delight.
  • Mediterranean Turkey Salad: Toss shredded turkey with olive oil, lemon juice, fresh herbs, olives, and feta for a refreshing twist.

3. Mashed Potato Magic

That bowl of creamy mashed potatoes can evolve into something entirely new.

  • Croquettes: Combine mashed potatoes with chopped turkey, cheese, and green onions. Roll into balls, coat in breadcrumbs, and fry until crispy.
  • Mashed Potato Soup: Blend mashed potatoes with turkey broth, sautéed onions, and cream for a velvety soup. Garnish with crispy bacon or chives.
  • Flatbread Base: Spread a thin layer of mashed potatoes on naan or pita bread, top with roasted veggies and cheese, then bake until bubbly.

4. Stuffing Innovations

Stuffing is already packed with flavor, so repurposing it is a breeze.

  • Stuffing Breakfast Bake: Combine stuffing with beaten eggs, diced turkey, and cheese, then bake for a hearty breakfast casserole.
  • Stuffing Meatloaf: Use stuffing as a binding agent in your next meatloaf recipe. It adds moisture and seasoning without extra effort.
  • Crispy Stuffing Balls: Shape stuffing into small balls, coat in breadcrumbs, and bake or fry. These make excellent party appetizers.

5. Reinvent Cranberry Sauce

Don’t let cranberry sauce sit idly by. It can brighten both sweet and savory dishes.

  • Cranberry Vinaigrette: Whisk cranberry sauce with olive oil, balsamic vinegar, and Dijon mustard for a tangy salad dressing.
  • Savory Grilled Cheese: Spread cranberry sauce on bread before adding brie or sharp cheddar. Grill for a gooey, sweet-savory sandwich.
  • Cranberry Barbecue Glaze: Mix cranberry sauce with your favorite BBQ sauce for a unique glaze on grilled chicken or pork chops.

6. Veggies in the Spotlight

Leftover roasted vegetables often end up forgotten, but they deserve the spotlight.

  • Veggie Risotto: Stir roasted vegetables into a creamy risotto for a comforting, one-pan dinner.
  • Roasted Veggie Tacos: Pile vegetables into tortillas with avocado, salsa, and a sprinkle of cheese.
  • Vegetable Quiche: Mix vegetables with eggs, cream, and cheese, then bake in a pie crust for an elegant brunch option.

7. Rolls Beyond the Breadbasket

Rolls aren’t just a side dish; they’re a base for countless creations.

  • Bread Bowl Soup: Hollow out rolls to create edible bowls for soups like turkey chili or mashed potato soup.
  • Monte Cristo Sliders: Use rolls to make mini Monte Cristo sandwiches. Fill with turkey and cheese, dip in egg batter, and fry. Serve with cranberry sauce for dipping.
  • Roll Croutons: Cube leftover rolls, toss with olive oil and seasoning, then bake until crispy. These are perfect for salads or soups.

8. Gravy Gets Gourmet

Gravy can elevate even the simplest dishes.

  • Turkey Stroganoff: Combine gravy with sour cream and serve over egg noodles or rice for a rich stroganoff.
  • Biscuits and Gravy: Pour reheated gravy over freshly baked or leftover biscuits for a Southern-style breakfast.
  • Gravy Poutine: Layer fries or potato wedges with turkey, cheese curds, and gravy for a Canadian-inspired treat.

9. Dessert Leftovers Reimagined

The dessert table often leaves its own pile of potential.

  • Pumpkin Pie Pancakes: Mix leftover pumpkin pie filling into pancake batter for a seasonal breakfast treat.
  • Pecan Pie Ice Cream Sundaes: Chop up pecan pie and sprinkle over vanilla ice cream. Drizzle with caramel for an indulgent sundae.
  • Cake Parfaits: Layer crumbled cake or brownies with whipped cream and fresh fruit for a quick dessert.

10. Create a Leftover Buffet

If you have guests staying over or want to keep things casual, set up a leftover buffet.

  • DIY Sandwich Bar: Set out rolls, turkey, cranberry sauce, gravy, and stuffing for custom sandwiches.
  • Build-Your-Own Bowls: Offer a base like mashed potatoes, stuffing, or rice, with toppings like turkey, veggies, and gravy.
  • Thanksgiving Pizza Station: Provide stuffing crust, gravy as the “sauce,” turkey, veggies, and cheese for personalized Thanksgiving pizzas.

11. Freeze for Future Feasts

Sometimes the best way to handle leftovers is to save them for another time.

  • Turkey Freezer Meals: Portion out turkey into freezer bags with gravy for quick future dinners.
  • Stock Up: Use the turkey carcass to make stock, then freeze it in ice cube trays for easy use in soups and sauces.
  • Holiday Desserts Later: Freeze slices of pie or cake to enjoy when you’re craving a festive treat but don’t want to bake.

12. Give Back with Leftovers

Share the abundance by donating or sharing extras.

  • Local Charities: Many shelters accept cooked food donations. Check guidelines before dropping off.
  • Neighborly Sharing: Package leftovers in small portions and deliver to friends or neighbors who couldn’t attend your gathering.
  • Family Meal Prep: If you know someone with a busy schedule, assemble and freeze meal portions for them to enjoy later.

13. Plan Ahead for Next Year

Turn this year’s leftovers into a lesson for next Thanksgiving.

  • Adjust Quantities: Scale recipes to match the number of guests to avoid over-preparation.
  • Think Freezable: Choose recipes that freeze well, so leftovers become ready-made meals.
  • Repurpose Recipes: Intentionally create dishes that lend themselves to leftovers, like roasting extra turkey for meal prep.

Thanksgiving leftovers are a gift that keeps on giving. By thinking creatively and using these tips, you can turn your post-holiday fridge into a treasure trove of exciting meals. Whether it’s turkey ramen, pumpkin pie pancakes, or a leftover buffet, there’s no end to the possibilities. Embrace the flavors, experiment in the kitchen, and make your Thanksgiving feast last all week long.
Tags:

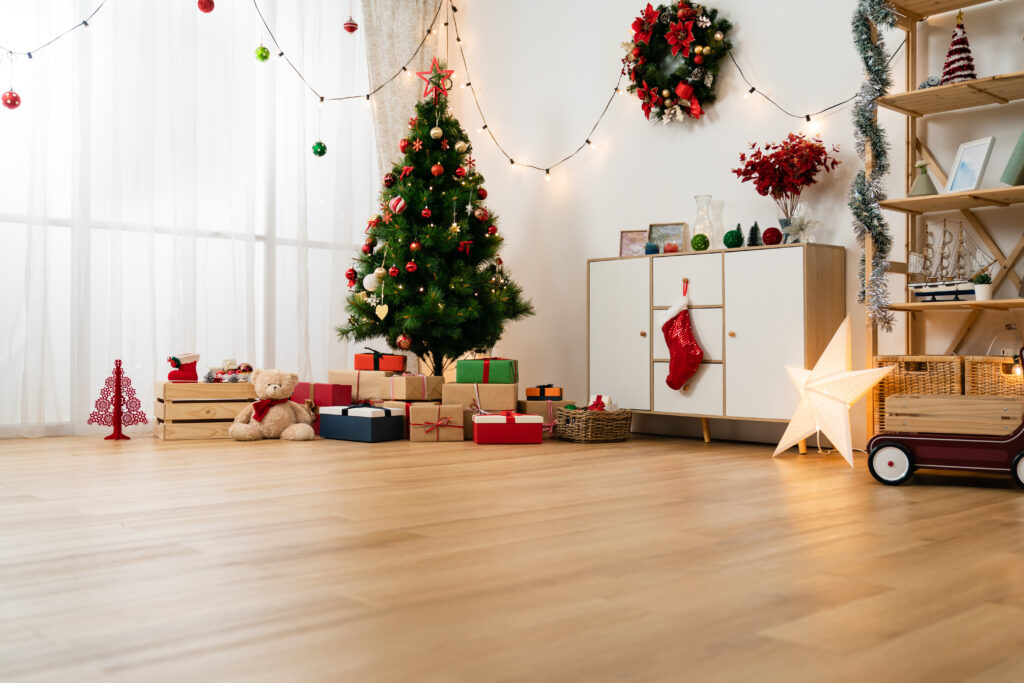
With the holiday season fast approaching, it’s time to get your home ready for entertaining family and friends. When living in an area known for its unique mix of climate and lifestyle, choosing the right flooring can set the stage for a welcoming and memorable holiday environment. Here’s your guide to making your floors holiday-ready, from style tips to durability and easy maintenance.

1. Elevate Your Style: Choosing Flooring That Complements Your Decor

Selecting the right flooring can help tie together your home’s decor, offering the perfect blend of elegance and resilience. Consider these top flooring styles that work well in spaces where both holiday gatherings and day-to-day living come together:

  • Hardwood Flooring: Hardwood floors add a timeless elegance to any space. Available in various finishes and wood species, hardwood can complement holiday decor beautifully while bringing warmth and sophistication to rooms used for gatherings.
  • Luxury Vinyl Plank (LVP): For a stylish, budget-friendly option, LVP offers the look of hardwood with added durability—perfect for high-traffic areas. With resistance to water and scratches, it’s an ideal choice for areas where you’re hosting guests or entertaining.
  • Tile Flooring: Tile flooring’s versatility makes it a great option for the holiday season, whether you prefer the look of natural stone, marble, or ceramic. Tile not only withstands heavy use but also gives you room to get creative with design. Opt for finishes and patterns that enhance your holiday aesthetic while fitting seamlessly into your home year-round.

2. Plan for Durability and Easy Maintenance

With extra foot traffic and the possibility of spills, durability is essential. By selecting flooring that’s as practical as it is stylish, you can worry less about maintenance during the busy season.

  • High-Durability Options: Hardwood, LVP, and tile all rank high in durability, but certain finishes make them even more resilient. Water-resistant LVP and specially treated tile or hardwood finishes provide peace of mind for high-use spaces.
  • Scratch Resistance: Homes with pets or children will benefit from scratch-resistant flooring like LVP or durable ceramic tiles, making them ideal for spaces where guests will gather and celebrate.
  • Simple Cleaning: Hardwood and LVP floors require little upkeep, needing just a quick sweep or mop to stay fresh. Tile, when sealed, also cleans easily. For holiday hosting, choosing floors with dirt- and stain-repelling finishes keeps your prep time manageable.

3. Comfort with Style

Even in warmer regions, winter calls for a cozy, inviting atmosphere. Flooring can add comfort underfoot and warmth to any room, making it ready for seasonal festivities.

  • Carpet for Cozy Comfort: Nothing says cozy like carpet, especially in living rooms or bedrooms. Plush, stain-resistant carpets provide warmth and comfort underfoot, creating a soft surface that’s perfect for seasonal gatherings.
  • Radiant Heating Options: Radiant floor heating works wonders for those chilly winter evenings, especially when installed under tile or hardwood. Imagine the comfort of stepping onto warm floors in areas where you spend the most time during the holiday season.
  • Accent with Area Rugs: Area rugs add an extra layer of warmth and protection. Not only do they tie rooms together aesthetically, but they’re also practical for high-traffic areas like living rooms and dining rooms, protecting your floors and adding a pop of seasonal color.

4. Prepping for Holiday Guests: Cleaning and Maintenance Tips

A little maintenance before guests arrive ensures that your floors look fresh and inviting. Taking the time to clean and prep can make a big difference when hosting.

  • Deep Clean for a Fresh Start: A deep cleaning can make your flooring shine for the holidays. A professional polish for hardwood floors restores their luster, while carpets benefit from a deep clean to lift out any buildup from previous months.
  • Protective Finishes: If you have hardwood or tile floors, consider applying a protective finish. Not only does this protect against spills and stains, but it also gives your floors a refreshed, polished look just in time for the season.
  • Floor Mats at Entrances: Place mats at entry points to keep out dust, sand, and moisture. This extra layer of protection preserves floors, making cleanup easier, especially in busy entryways or common areas.

5. Flooring Fit for Kids and Pets

The holidays often mean guests with kids and pets, making it essential to choose flooring that can handle the extra excitement and potential messes.

  • Waterproof Flooring Options: LVP and tile are both waterproof, making them a top choice for homes with kids or pets. From accidental spills to pet messes, waterproof flooring handles it all without hassle.
  • Stain-Resistant Carpeting: If you prefer carpet in your living spaces, look for stain-resistant options. These carpets are designed to withstand spills, making cleanup simple and keeping carpets looking fresh.
  • Rug Layers for Added Protection: Adding washable area rugs over your flooring in high-use areas keeps it protected from everyday wear and tear. Look for durable, non-slip rugs that can handle busy gatherings and stay in place for the season.

6. Decor That Protects Your Floors

Holiday decor adds magic to the season, but certain decorations can be rough on flooring. Here’s how to protect your floors while decking the halls:

  • Tree Mats for Christmas Trees: Placing a mat under the tree protects your floor from water spills and pine needles. For real trees, a waterproof mat prevents moisture from damaging hardwood or carpet underneath.
  • Furniture Pads for Rearranged Spaces: If you’re moving furniture to make more room for guests, use furniture pads under chairs, tables, and couches to avoid scratches and scuffs on hardwood or tile.
  • Mindful Holiday Lights: Be cautious about placing holiday light cords along the floor or under rugs. Avoid pinching cords under heavy furniture, and keep cords out of high-traffic areas to prevent wear on both your floors and your holiday lighting setup.

7. Quick and Easy Post-Holiday Cleanup

After all the festivities wind down, your floors might need a little extra TLC to keep them looking great.

  • Spot Clean for Spills: For carpet, blot spills with a clean cloth and use a carpet cleaner as needed. For hardwood and tile, a mild cleaner and mop will take care of any residue left from holiday activities.
  • Wash Area Rugs: Washable area rugs can be refreshed with a quick wash, especially if they were placed in high-traffic areas. Machine-washable options make cleanup a breeze and keep rugs looking good for the next season.
  • Inspect for Damage: Once things have settled, take a moment to inspect your floors for any scratches, stains, or scuffs that may have occurred. For hardwood, a touch-up kit can help with minor scratches, while specialty carpet cleaners tackle stains. Regular post-holiday maintenance ensures your floors stay in top condition.

Holiday-Ready Flooring Brings Style and Function Together

Preparing your floors for the holidays doesn’t have to be overwhelming. With the right choices, your flooring can add elegance and durability to your home, setting the tone for an inviting and memorable season. From hardwood and LVP to plush carpet and durable tile, there’s an option for every room and every style.

This holiday season, let your floors make a lasting impression, adding beauty and resilience to all of your celebrations. A well-prepared home allows you to focus on what matters most—celebrating with family and friends. So start planning now, and enjoy a holiday season where your flooring is as ready as your holiday spirit! Click here to explore options perfect for every celebration!

Tags:
Nov-17-2010

Thanksgiving Recipe: Super Apple Pie

Posted by Carpets N More under Thanksgiving

Here at Carpets N More, it is our goal to make you and your family happy in your home.  Thanksgiving is right around the corner and we thought we’d share one of our holiday recipes with you.  Now, close your eyes and imagine the deep, warm scent of apple pie baking in the oven.  It’s almost like you can taste it!  Below is one of our favorite apple pie recipes of all time.  Happy Thanksgiving!

Ingredients

For the crust:

  • 6 ounces unsalted butter, cut into 1/2-inch pieces
  • 2 ounces vegetable shortening, cut into 1/2-inch pieces
  • 5 to 7 tablespoons applejack
  • 12 ounces all-purpose flour, approximately 2 3/4 cups, plus extra for dusting
  • 1 teaspoon table salt
  • 1 tablespoon granulated sugar

For the filling:

  • 3 to 3 1/2 pounds apples, mixture of Granny Smith, Honeycrisp, Braeburn and Golden Delicious, about 6 large apples
  • 1/2 cup sugar, divided
  • 3 tablespoons tapioca flour
  • 2 tablespoons apple jelly
  • 1 tablespoon apple cider
  • 2 teaspoons freshly squeezed lime juice
  • 1/4 teaspoon kosher slat
  • 1/4 teaspoon freshly ground grains of paradise

Directions

For the crust:

Place the butter, shortening and applejack into the refrigerator for 1 hour.

In the bowl of a food processor, combine the flour, salt and sugar by pulsing 3 to 4 times. Add the butter and pulse 5 to 6 times until the texture looks mealy. Add the shortening and pulse another 3 to 4 times until incorporated.

Remove the lid of the food processor and sprinkle in 5 tablespoons of the applejack. Replace the lid and pulse 5 times. Add more applejack as needed, and pulse again until the mixture holds together when squeezed. Weigh the dough and divide in half. Shape each half into a disk, wrap in plastic wrap and refrigerate for at least 1 hour and up to overnight.

For the filling:

Peel and core the apples. Slice into 1/2-inch thick wedges. Toss all of the apples with 1/4 cup of the sugar, place in a colander set over a large bowl and allow to drain for 1 1/2 hours.

Transfer the drained liquid to a small saucepan, place over medium heat and reduce to 2 tablespoons. Set aside to cool. Toss the apples with the remaining sugar, tapioca flour, jelly, cider, lime juice, salt and grains of paradise.

For assembling and baking the pie:

Preheat oven to 425 degrees F.

Remove one disk of dough from the refrigerator. Place the dough onto a lightly floured piece of waxed paper. Lightly sprinkle the top of the dough with flour and roll out into a 12-inch circle. Place into a 9 1/2 to 10-inch tart pan that is 2-inches deep. Gently press the dough into the sides of the pan, crimping and trimming the edges as necessary. Set a pie bird in the center of the bottom of the pan.

Place the apples into the unbaked pie shell in concentric circles starting around the edges, working towards the center and forming a slight mound in the center of the pie. Pour over any liquid that remains in the bowl. Roll out the second pie dough as the first. Place this dough over the apples, pressing the pie bird through the top crust. Press together the edges of the dough around the rim of the pie. Brush the top crust with the reduced juice everywhere except around the edge of pie. Trim any excess dough. Place the pie on a half sheet pan lined with parchment paper and bake on the floor** of the oven for 30 minutes. Transfer to the lower rack of the oven and continue to bake another 20 minutes or until the apples are cooked through but not mushy. Remove to a rack and cool a minimum of 4 hours or until almost room temperature.

Nov-13-2010

Thanksgiving with Style: Part 1

Posted by Carpets N More under Thanksgiving

The Thanksgiving display in this photo is well-designed and inviting. But look closer and you can see that fall accessorizing is a simple process.

Start with the main features. In this photo, the basket and lantern provide the dark tones and a strong background for the display. Do you have any baskets, bowls, plates, candlesticks or other elements in fall tones? Collect them and bring to your display area. Some or all of these elements will give you a good start.

Your grocery store is the next stop. Look for pumpkins on sale after Halloween and any other fall elements such as gourds, or gather a variety of squash, which look good in a display and taste good roasted after Thanksgiving.

Look to your own yard for the smaller finishing elements. Fall leaves, acorns, pine cones and berries add color and texture to your decorating. Pile them in a bowl or scatter on the table as this photo demonstrates.

With a little imagination and effort, you can make your home feel like Thanksgiving. Whether in the entryway, living room or dining area, adding a touch of fall makes your guests feel welcome.  Do you have any other ideas you’d like to share with us?